We’re delighted to be working with Mini Tummies, experts (and parents) in early years nutrition.
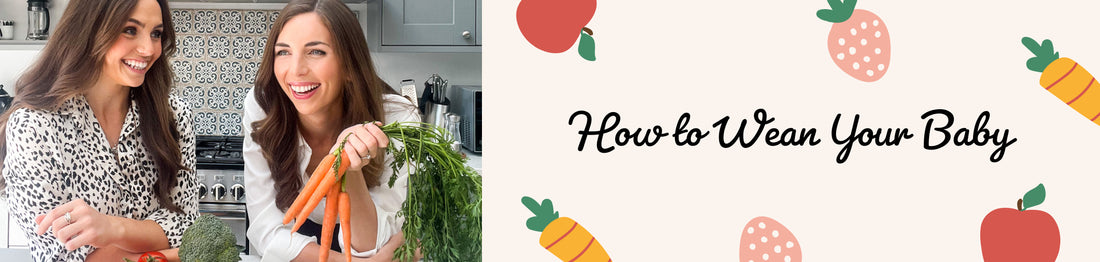
Weaning your little one can be an overwhelming, if not a downright stressful experience. With so much conflicting advice out there, we wanted to cut through the noise to bring you a simple, stress-free guide that aims to make those first tastes a positive experience for you and your little eaters. Read on for some top tips and tried and tested recipes that aim to make mini mealtimes a breeze.

Hi there. We’re Elise (paediatric dietitian) and Claire (registered nutritionist mBANT and mama), founders of Mini Tummies - a new early years nutrition platform here to help you win at weaning and beyond.
We started Mini Tummies to help you navigate through the nutrition nonsense and share only the latest, most trusted science-backed information and resources parents need to nourish their little ones. Those early years are so important for building healthy relationships with food for life and we want to empower you not only to embrace mealtimes, but to enjoy them too!
Starting solids can be a nerve-wracking time and, let’s face it, there’s a lot of misinformation out there. But it doesn’t need to be complicated. At Mini Tummies, we’ve created a safe space for early years nutrition education from qualified experts. We aim to take the anxiety away so you can say bye bye to Google and feel confident in raising happy, healthy eaters.

If you’re about to start weaning, you’ve probably heard the debate between “baby-led” vs. “spoon-fed” weaning. But the truth is, there is no single *correct* way to wean your baby - and both of these feeding methods can be part of a great weaning journey. Our approach takes what the scientific evidence says and combines it with the reality of parenting to make it practical, helpful and achievable.

It’s recommended that complementary foods (alongside their breastmilk or formula) are ideally introduced when your baby is around 6 months old - and not before 4 months. The exact time will be unique to your little one and very much depends on when they’re developmentally ready.
The good news is that they’ll show you when they’re ready! Here are the key signs to look out for:
- They can sit up with minimal support and steady head control.
- They can coordinate their hands and eyes, picking up objects and bringing them to their mouths.
- They show interest when there’s food around, intently watching you eat, leaning forward and opening their mouths.
- Their tongue thrust reflex is no longer present, so they don’t instinctively push food back out with their tongue.
Your baby might show all these signs a little before or after they hit 6 months of age.

You don’t need to splash out on a whole bunch of unusual baby food-making machines or high-tech equipment. Our selection of core essentials will get you fully prepped and feeling ready, without breaking the bank.

When you’re on the hunt for a highchair, there are four key components we recommend looking out for:
- A fully upright seat (not reclined)
- A footrest (not too low, letting their feet sit flat)
- A tray they can easily reach (not too high)
- A 5-point harness (to strap them in, help their posture and keep them safe)
A removable tray and adjustable height can be great features to have too, so the chair grows with them and they can join you at the table for a family meal.
A highchair that has all of these features will help to make sure your baby is in a position that’s correct and safe for chewing and swallowing, supporting them to sit upright properly, be grounded on their feet and reach for the food easily.
Take a look at Scandiborn’s curation of stunning highchairs and accessories, ergonomically designed and sustainably sourced–these parenting heroes are designed to grow with your child.

Not all bibs are created equal. Take a fabric or cloth bib for example: these work well for milk and dribble, but when it comes to starting solids, you’ll want to go for something a bit more substantial and effective.
Our top pick is a pelican bib that has a catch-all front pocket for the inevitable messy mealtimes while they’re learning to self-feed (although food on the floor is still to be expected!). An adjustable neck makes sure they’re comfortable and quick to fasten before they dig in.
Silicone bibs are a good option, as they’re practical, food-safe, waterproof, sustainable and super easy to clean. Simply toss them in the dishwasher and they’ll stay stain-free. Silicone pockets are food safe, and they easily fold up in your bag for meals on the go.
If your baby doesn’t like wearing a bib, a waterproof long sleeve coverall can be the way to go. Go for one with a fun design and they might even enjoy wearing them too, reducing the “bib tug-of-war” at mealtimes!
Those clever folk over at Liewood have nailed the bib game with their collection of pretty and practical cover ups in cute Scandi inspired designs, perfect for guaranteed mess-free mealtimes.

A silicone tableware set with a plate, bowl, open cup and spoon is very handy and the material means they’re BPA free, dishwasher safe and won’t be broken by little flailing arms!
Plates and bowls with suction bottoms can also help your baby to develop their self-feeding skills by providing stable sides for them to push their cutlery or hands against. Sticking it firmly to the highchair tray can help to prevent spills and reduce the amount of food that ends up on the floor too.
You’ll often see a variety of plates with fun shapes and different compartments too. Novelty designs can make food more appealing and enjoyable for your little one, but there are some pros and cons of using divided plates that are good to be aware of.
Snap up one of these gorgeous sets that tick all the boxes for fuss free feeding time.
Divided plate pros:
- Allows you to serve the full meal together without differentiating “main meal” or “dessert”
- Gives your baby more freedom to explore and follow their preferences
- More edges for baby to push food up against and help self-feeding
- For a toddler who seems to struggle with certain foods touching, this can be helpful
Divided plate cons:
- Foods touching may become unfamiliar and unsettling
- Older children and adults don’t tend to eat from segmented plates, so it can be helpful to get them used to a more traditional style plate early on
Our advice: mix it up! Use plates with and without separate sections, so they don’t get *too* used to one or the other. You can also go for one with a removable divider that you can take off as and when you like. The more they’re exposed to a variety of different plates and bowls, the more familiar and less reliant they’ll be on a single type.


Go for non-metal spoons that are gentle on your baby’s gums and don’t become too hot when in contact with food. A set of soft silicone spoons is our top choice as they’re durable, unbreakable and dishwasher safe to boot.
Cutlery with a fork or spoon on both ends are a space-saving option (and means it’s OK for them to inevitably chew the ‘wrong end’ while they get to grips with feeding themselves!)
For babies just starting out, going for cutlery with a wider handle can be helpful to prevent them pushing it too far back in their mouth.

As they start solids, now’s the time to start slowly introducing them to an open cup too. Transitioning from a bottle to a cup can feel a little daunting. Oh, the spills! But you may be surprised to see how quickly your baby can learn how to drink from a cup. Opt for an open cup as this will be used for life (unlike a sippy cup, which will only be used in their early years) and offer small sips with meals.
A small silicone cup is ideal, as it can easily be held in their little hand and won’t break when they drop it. This will teach them the skill of sipping, rather than sucking. Getting them familiar with an open cup from 6 months of age gives them plenty of time to develop their skills before stopping formula bottles or breastfeeding.


Prep once, eat several times. Batch cooking family meals your baby can enjoy too is a win-win, so pick up some small baby portion-sized containers you can store in the fridge. Silicone ice cube trays are a great way to store purées in the freezer and will let you simply pop out one cube at a time when you need it.
A stainless steel lunchbox is a great option for keeping their food fresh on-the-go, while being durable and easy to clean - without absorbing stains or smells from the food.

At Mini Tummies, we’re all about keeping things practical, helpful and reducing the mental load of mealtimes, so you can focus on family time.
Here are three things you can implement now for mealtime success and to help them develop a life-long healthy relationship with food:

Eating together lets you role model how to eat the food, fosters their learning and shows them it’s safe to tuck in. Making “mmm” and “yumm” noises as you eat is a great way for them to see that food is tasty and something to enjoy. They’re also much more likely to try unfamiliar food when you’re eating that same food along with them. Even if having your own dinner with them isn’t possible, try having just a tiny portion of whatever they’re having.

One of the most important messages within our Mini Tummies Method is to *feed responsively*. Babies are brilliant at following their appetite and hunger cues, which is something that as adults, many of us can struggle with after being told to “finish your plate”.
Responsive feeding means they choose what and how much they eat from what’s on offer, and we (as parents) recognise and respect their hunger and fullness levels. So, take the pressure off and avoid pushing or bribing them to eat. By the time they reach toddlerhood, this becomes even more important. So, practicing our *Play It Cool Rule* now will help you handle any periods of food fussiness later on!

Messy mealtimes are actually a good thing for your baby! Accepting that your little one will get a little (or very!) messy during weaning not only helps them get used to lots of different textures, but can also support their learning as they explore by themselves with all their senses.
Stay away from the baby face wipes while they're eating and hold the clean up until they're done. Don't worry, in time they'll learn from your role modelling to keep the food on their plate and into their mouths. Like any skill, it takes practice.
MINI TUMMIES FREE GUIDE: If you’re feeling overwhelmed about starting solids and want to make sure you’re getting their eating journey off to a great start, grab our free Weaning Cheat Sheet that’ll guide you through the key nutrients for weaning.

These recipes are quick, simple, nutritious - you can nourish those mini tums without spending hours in the kitchen.

This is a great one-pan dish the whole family can enjoy. The beans add a hit of iron, while the vitamin C in the tomatoes helps to increase iron absorption. It’s a perfect recipe for a pressure cooker when you’re short on time. Plus, it’s great for lunchbox leftovers the next day.
For younger babies, mash well with a fork or blitz a little in a blender, while leaving some texture. For older toddlers and children, you can leave chunkier. Serve with quinoa and mashed avocado for a tasty balanced meal.
For 2 adults and 2 children, you’ll need:
1 400g can of black beans
2 courgettes
2 carrots
1 onion
1 can of chopped tomatoes
2 garlic cloves
1 cup of water
½ tsp paprika
½ tsp cumin powder
Olive oil for sautéing
Additional for adults at the end: chilli powder and salt
- Finely chop all the vegetables and garlic.
- Heat the olive oil in a pan or pressure cooker, then sauté the onion and garlic for 3-4 minutes until soft. Add the carrots and courgettes, then sauté for a further 3-4 minutes.
- Stir in the spices for 1-2 minutes.
- Add the black beans, tomatoes and water, and mix well.
- If you’re using a pressure cooker, secure the lid and pressure cook for around 7 minutes. For cooking in a saucepan, cover and reduce the heat then let it simmer for about 20 minutes.
- Once cooked, remove from the heat, allow to cool a little then serve. For adults: season to taste.

This is a light, creamy and chocolatey dessert - without any added sugar, salt or cocoa. Trust us on the cauliflower in this. It’s so simple and delicious for little ones, as well as for adults.
Carob is a great caffeine-free alternative to cocoa powder with extra fibre and a naturally sweet taste. If you can't find it in your local shop, it's easy to get online. And there's no "hiding" the cauliflower here. Tell them what's in there and let them see it going in! They'll soon realise they love cauliflower.
*Suitable for little ones from when they start solids, just make sure you’ve introduced the ingredients separately first and have checked allergens (almonds, peanuts, milk)*
For 6-8 puddings, you'll need:
1 cup (125g) cauliflower florets
1 ripe banana
1/4 cup (60ml) unsweetened almond milk (or any milk)
1/4 cup (60g) peanut butter (or any smooth nut butter)
1/4 cup unsweetened carob powder
1/2 cup Greek yoghurt (or any thick yoghurt)
1 tsp vanilla extract (alcohol-free)
- Steam the cauliflower for about 10-15 mins until soft, then let it cool for a few mins
- Blend all the ingredients until smooth and creamy: cauliflower, banana, milk, nut butter, carob powder, yoghurt and vanilla extract
- Pour the mixture into small cups and pop in the fridge for a couple of hours until set, then enjoy.
Note: This post has been created for information purposes with typical babies and children in mind. It is not personal nutrition advice, every baby is different and may have other needs beyond what is covered here. Always speak to your healthcare professional if you have any questions or concerns about your baby’s feeding plan.